I had a reason to see if I could get Ghost running alongside this WordPress install today, and it turns out that once you follow the correct and up-to-date instructions, it’s quite simple. I run Apache rather than nginx, so the default instructions don’t work. The magic happens with the RequestHeader line and the whole https component of the VirtualHost looks like this:
    <VirtualHost *:443>
            ServerAdmin webmaster@localhost

            ServerName ghostblog.domain

            ErrorLog ${APACHE_LOG_DIR}/error.log
            CustomLog ${APACHE_LOG_DIR}/access.log combined

           ProxyPass / http://127.0.0.1:2368/
           ProxyPassReverse / http://127.0.0.1:2368/
           ProxyPreserveHost On
           RequestHeader Set X-Forwarded-Proto "https"


            Include /etc/letsencrypt/options-ssl-apache.conf
            SSLCertificateFile /etc/letsencrypt/live/ghostblog.domain/fullchain.pem
            SSLCertificateKeyFile /etc/letsencrypt/live/ghostblog.domain/privkey.pem
    </VirtualHost>
There’s also the redirect from http to https but I do that in a separate VirtualHost with a permanent redirect. Without the RequestHeader line, you end up with a lot of internal redirects when you try to access the site over https.
Following the official installation works well, and if it detects that nginx isn’t installed, Ghost-CLI will let you skip that part of the configuation and it trusts that you’ll figure it out some other way.
Ghost-CLI also performs the database configuration and stuff for you, assuming you know the/a MySQL username and password on your server.
Thoughts
I only had a cursory look inside Ghost and my first thought is that it’s so quick. Really, really quick. I’m tempted to move this site there. Or maybe I’ll make bitterswede.com a thing in Ghost and slowly migrate across. The main thing that’s getting in the way of moving over is that I’ve used a theme called Divi which I suspect has inserted a lot of garbage into posts made with the Divi Builder.
“Are you home Thursday night, or do you have yoga?”
“Are the kids going anywhere this weekend?”
“I’m sure I mentioned that!”
I’ve wanted to build a family week planner for ages that puts everyone’s week on a easy to read screen somewhere in the house. Maybe somewhat surprisingly, I’m not a big fan of home automation or a “smart” house, so I don’t want this thing to alert me in the morning that “Today J has five appointments blah blah”. I just want to be able to look at it every now and again and see what’s coming up.
I used to run an Exchange server for all my various email accounts, and that was good, but it started becoming an issue with out-of-date software. The option to move to O365 was there, but it feels expensive, especially since several of the accounts are for the kids and aren’t “serious” mailboxen.
I spun up a cheap (US$10/month) Ubuntu server on Linode and ran the setup script for Mail-in-a-Box, which has worked (touch wood) nearly perfectly since. The issues so far have been pretty minimal. Microsoft was blocking my IP address for all Outlook-themed email services (live.com, hotmail.com, etc), but emailing them asking them to stop worked. When I reboot the server, the Outlook app on an iPhone stops syncing, and the account has to be removed and re-added. I also need to figure out how to make it send calendar invites properly over email.
Considering I have about 10 mailboxen on there, I’m way ahead in terms of cost.
The Mail-in-a-Box script installs NextCloud (an OwnCloudfork), which has a WebDAV implementation for calendar and contacts.
Step 1 for getting a week planner up will be to figure out how to interrogate the CalDAV server with some sort of programming language. I’m comfortable with PHP, so that’s what I’m going to do it with. Specifically, using cURL from PHP and then stuffing the results into an array to display later.
A bit of reading and digging in the WebDAV standards has lead me to being able to grab calendar entries for an account on the serer with the following command:
The time-range field will limit the calendar entries that will be grabbed based on the starting-time.
This spits forth a large blob of data that will be interrogated later.
There will be tricky things to over-come like multi-day events and the like, but based on some work I’ve done previously with a calendar and loading events, I think I have a plan.
I found lots of posts about developing film at home, but it felt like they left out some details. I’ll, inevitably, also leave things out, but I’m going to have a crack at writing a comprehensive guide to getting as far as having a dry, clean, developed film, and throwing it into a scanner.
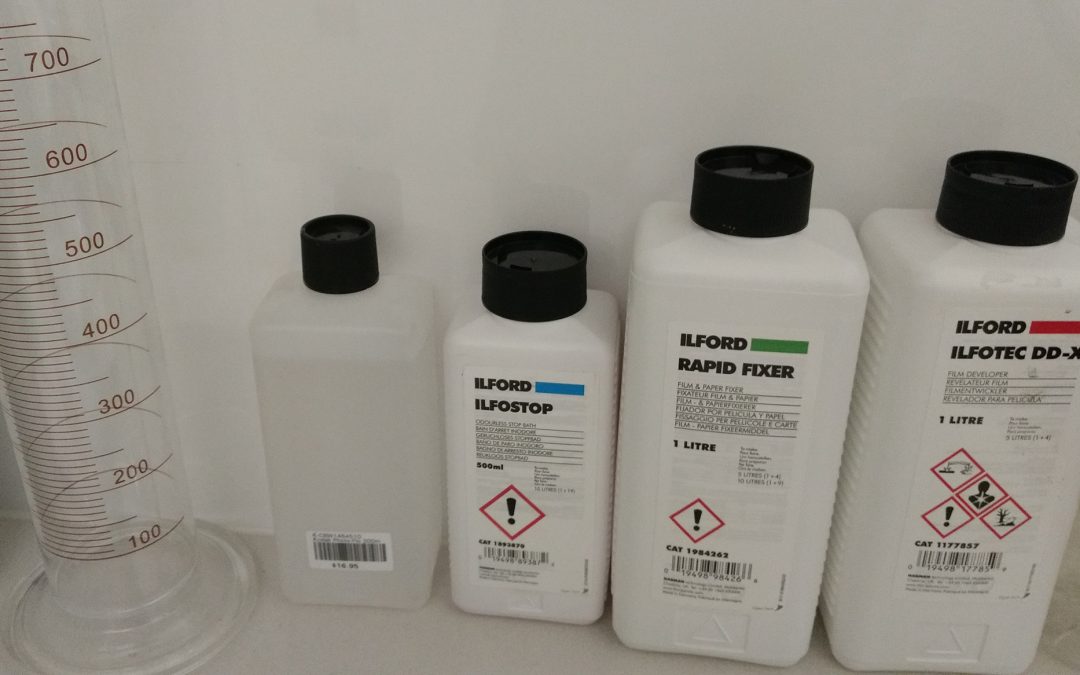
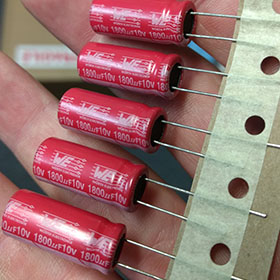
Step 1 was gathering all the equipment I needed. It seemed daunting initially, but it turns out that I didn’t actually need that much stuff. Links to products are just as examples, and are close (or exactly) what I’m using.
There’ll also be a short section on what I plan on doing next to make life a bit easier.
A Paterson Tank needs around 300ml of each chemical per film. The DD-X and Rapid Fixer both need to be diluted 1+4 (1 part concentrate, to 4 parts water). Doing some maths, you get 60ml of concentrate, and 240ml of water, to get to 300ml in total of developer.
The IlfoStop is 1+19, so to make 300ml you need 15ml IlfoStop and 285ml water.
The Photo-Flo is 1+199, so to make 300ml I need a splash of Photo-Flo and the rest in water – this is really not critical. It does, however, get a bit bubbly if you use too much, so I try to go easy on it.
Step 2 – I’ve been out and taken some photographs, and I’m back.
I get water to the right-ish temperature (a bit over 20°C is good) and mix my chemicals with that water and pour from the measuring cylinder into clearly labelled bottles. I then dry my work-space and get ready for the trickiest bit.
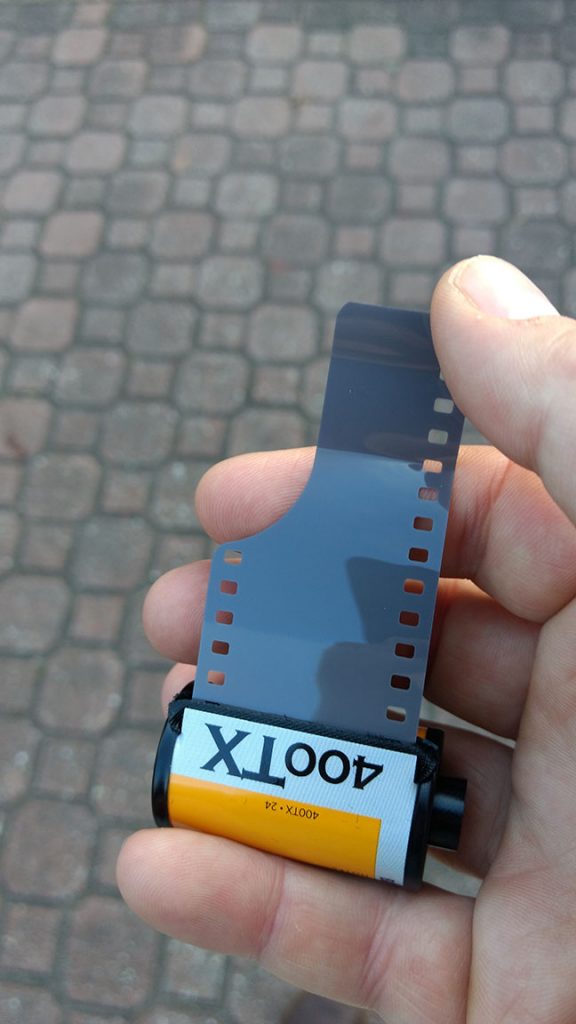
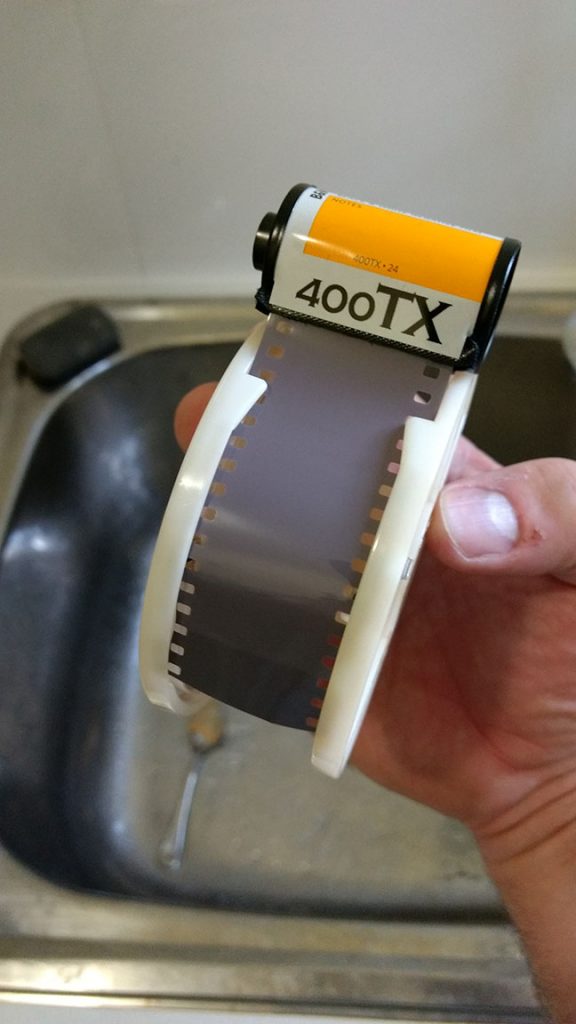
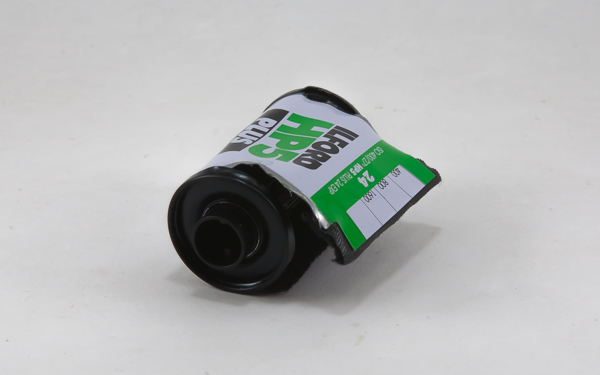
When I rewind your film from the camera, I listen closely to hear when the film has rewound to the point where it’s disconnected from the winder, but hasn’t gone so far that it’s gone all the way back into the cassette. This makes life easier, because I can start it on the spool in daylight.
I cut the end bit off the film to square it off, and feed it onto the spool until it’s gone past the ball bearings that are in the reels.
Trim…
…and wind on a bit.
This spool goes into the changing bag together with the centre post, the tank, the tank lid, and your scissors. I’m sure it’s not necessary, but I always have both spools in the tank when I develop, even if it’s just one film in the tank.
Now’s the tricky bit. I stuff my hands into the zipped up changing bag, and find all the bits. I unspool the film from the cassette and onto the spool by turning one side of the spool back and forth, while also unwinding the film from the cassette. When I’ve reached the end, I snip it off with the scissors, wind on the rest of the film so it’s all the way on, and assemble the tank and make sure I lock the lid on properly. I say this, because one time I didn’t, and the lid came off during the developing process and it wasn’t ideal.
Everything comes out of the bag, and it’s time to measure the temperatures of the chemicals. The most important one is the developer – the others are less important.
I’ve been pretty lucky and have managed to hit 19 or 20°C each time, so haven’t needed to compensate too much with the timings. Referring to the developing time chart for the film, I get the time required for developing at 20°C, then use the compensation chart to calculate the actual time required at the actual temperature. Today I did an Ilford HP5+ 400 film, which, at 20°C with Ilford DD-X needs 9 minutes. My DD-X was at at 19°C, so needed 10 minutes with temperature compensation.
The next bit, when I did it the first time, felt quite stressful. It feels like there are a lot of things to do in a short amount of time. I ran the steps through in my head a few times, as practise, and it worked out fine. The hardest part was definitely unspooling the film and getting that done neatly.
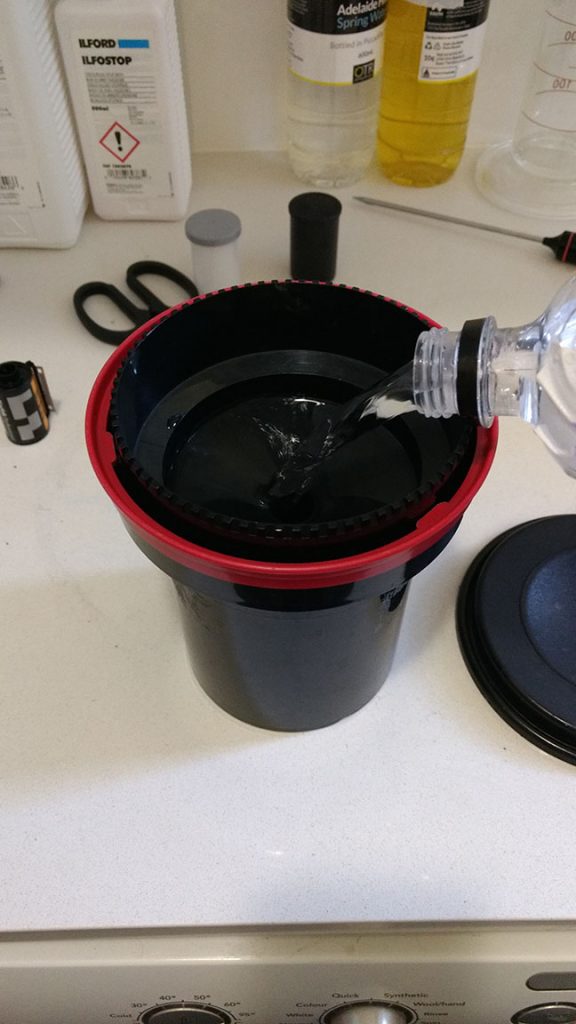
I start the timer as I pour the last bit of developer in to the tank. I then put the second lid on the tank and invert the tank 4 times, then gently tap it on the desk once or twice to make sure that any bubbles trapped in the spool come out. Every minute I invert the tank four times, tap the bench with the tank, and spend the next 50 seconds preparing the next step.
Filling the tank
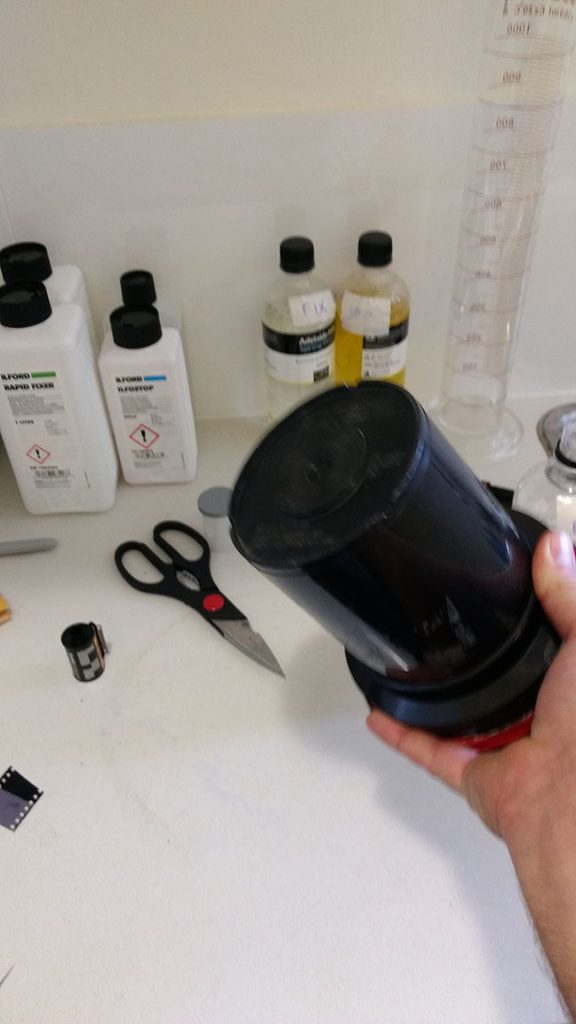
Inverting every minute
I start pouring the developer out in the last 10 seconds of the count-down, and once it’s all out, I pour in the Stop Bath. This only needs to be in for about 30 seconds, but I do make sure I swish it around thoroughly. Then I pour in the fixer which needs to be in for 3-5 minutes. I don’t know how important it is to invert this, but I make sure I do, just to make sure I get nice even coverage with the fixer.
When the time is up with the fixer, I start rinsing the film. I pour water, from the tap, into the top of the tank and let it pour for 5 to 10 minutes. It doesn’t need to flow fast, but I make sure I do a few tank-fulls of clean water first, and then leave the tap running for the 5 to 10 minutes. Then I pour in the Photo-Flo solution, give it a swish about, and pour it out.
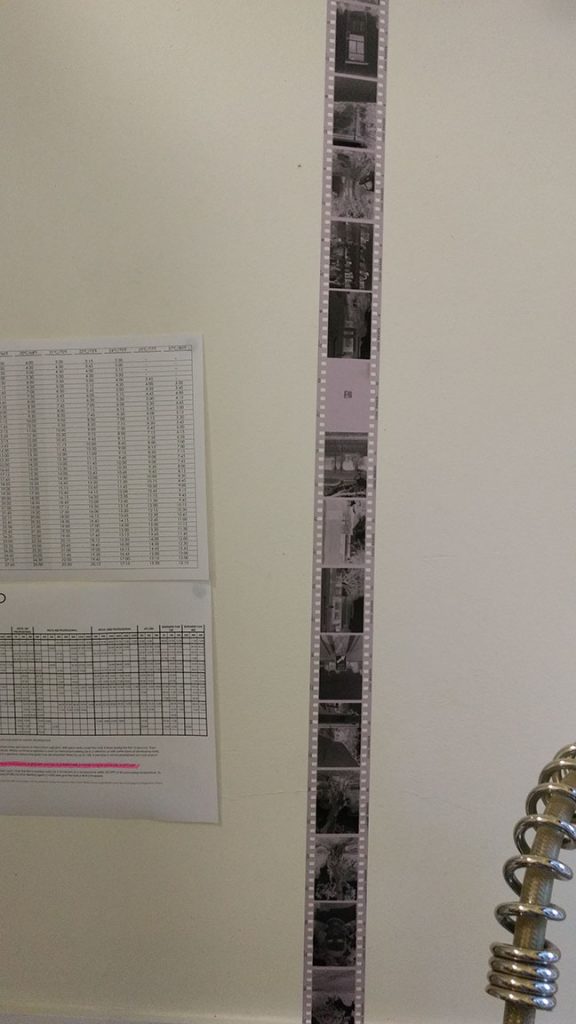
NOW! It’s time! I can open the tank up and inspect the film. I open the spool up to remove the film, and carefully hang the film up to dry, taking care not to touch it until it’s completely dry.
One developed film, hanging up to dry
I would really like to get an immersion heater to keep the chemicals at the right temperature – I think that’s going to be my next investment. And maybe a more sensibly sized measuring cylinder.
Once the film is dry, I slice it into groups of 6 frames, and scan them with my Epson Perfection V330 Photo scanner. Making sure the glass is nice and clean. Removing every piece of lint is not easy, and I tell myself that the odd bit of lint adds character. Or something.
A few weeks ago I wrote about doing wet photography again. I’m now two films in, and it’s as good as I remember it. My films aren’t working out perfectly. I’m making mistakes. A lot of them. Bad metering. Bad film handling. Bad dropping-the-film-out-of-the-Patterson-tank-during-the-developing-process. Bad walking-into-the-still-wet-film-leaving-lint-everywhere.
But, it doesn’t matter. I’m finding it incredibly relaxing. Incredibly fulfilling. And that’s exactly what I need, and exactly what I was hoping for. The last time I developed a film by hand was in year 10, and all the smells bring me right back to those hallways. Those buildings. I wholeheartedly recommend it.
If you’re a Fediversian, you can find me on my PixelFed instance. If you’re not, you should consider getting a Mastodon account at the very friendly aus.social, from where you can follow me here (@karloskar@bitterswede.com), my Mastodon account (@TechnicalKO@aus.social), and my PixelFed instance (@KO@photos.bitterswede.com). The other good place to find my photographs (other than right here!), is at Flickr.
I will do a post on my workflow, and general setup, once I’ve streamlined it a bit more.
One of the first photographs I scanned from my first Ilford HP5+ 400 film.
It’s no secret that I like technology, and I do, if I’m going to be absolutely honest with myself (and what better a place for that than in a place where about 56.1% of the world’s population can read it), think that I’m quite good at it. Quite good at software, and also quite good at hardware. Last week I repaired a motherboard on a motion controller, and it booted right up after many hours with a soldering iron and replacing components.
But I’m also tired. Maybe verging on exhausted.
Tired of “instant”. I’m tired of the process of taking a photograph is see, snap, review (probably redo these three steps a few times), then post, hashtag. After that it’s largely forgotten, with the exception of collecting notifications from bots.
This ties in with me dumping my Fitbit. Dumping Facebook. Dumping Instagram.
So, what is my plan?
My plan is to go analogue for photographs. Not exclusively, but significantly more than I have in the last…20 years.
I bought my first digital SLR in 200…and…5…I think. Since then I’ve been chasing crisper, less noise, and faster. Better lenses. Better/bigger sensors. The last camera I bought was a Canon 5D, and I have used that camera extensively. But the trap of reviewing, even on the back of that crappy LCD on the back, gets me nearly every time. I don’t sit back and trust that I have done the right thing, trusted my gut and taken a passable photograph.
So, now – to the plan. The plan is to not only start shooting film again, but I’m going to develop my own film, too. At this stage I’ll develop to film and probably scan the shots I want to do something with, but there’s nothing (except space in the laundry) that will prevent me from getting an enlarger, paper,some trays, some more chemicals, and printing my own.
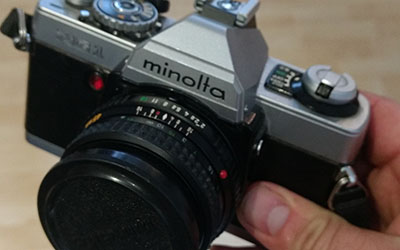
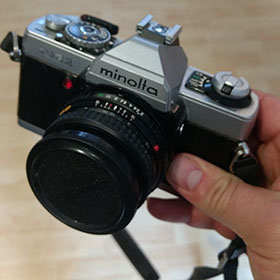
I asked my old photography teacher from high school if he had any developing tanks left, and not only did he have a Patterson tank, he also had a Minolta XG-1 with lenses and a flash that he wasn’t using any more. So I now own that, and I’m very pleased.
I’ve bought some film, and have taken a few pictures. But I don’t know if they’re any good until I develop them, and today I organised the equipment I need for that, beyond the tank. I ordered the developer, stop bath, and fixer from B&H in New York (for about $40 less than it would cost to buy locally – including shipping from the US). I ordered a couple of volumetric flasks for mixing chemicals, and some storage bottles. And a portable darkroom bag for loading the film onto the spools and into the Patterson tanks.
I’m very excited about this, and can’t wait to share the results. I will probably load the scanned photographs onto https://photos.bitterswede.com/KO
I need to invent a word that means analogue and digital combined to a level that suits me.
Signal, if you haven’t already heard of it, is an encrypted messaging app for both Android and iOS. My experience with Signal doesn’t extend into the iOS realm, but the experience won’t be that different, with the exception of iMessage being thrown into the mix.
There are many good articles about what Signal does, and how it does it. You can start by reading the app’s own page here: https://signal.org. There is no real point, I don’t think, to rewrite something that someone else has already written, probably in a much more elegant way.
Why do I use Signal? I like my communications to be encrypted. Not because I’m worried about law enforcement intercepting what I’m sending to my friends. Not because I’m worried about people stealing my phone and hacking into my SMSes. I like my comms to be encrypted because of all the companies profiting from knowing information about me. I don’t know if a regular SMS is being scanned for keywords by my telco, and that information is being sold to advertisers. But if you switch to an encrypted messaging app, there’s no way for them to do that.
When I talk to people, I often get the question of “How is it different from Whatsapp?”, and while in a broad way it does very much the same thing, there are two differences that sets it apart.
The first is that it replaces your standard SMS app, and only needs your mobile number to work. It will send a regular, unencrypted SMS to your buddies who don’t have Signal, and seamlessly switch to encrypted comms when they finally listen to you and install Signal too. You don’t need to remember how you communicate with whom. It’s all there in the one app. And, as a bit of a cherry on top, the company is a not-for-profit run by privacy wonks.
The second is that it’s not owned by Facebook. Even though Facebook can’t necessarily read what’s in the messages that are sent with Whatsapp, it does give them a map of who is communicating with whom. And the less Facebook knows about me, the happier I am.
Touching briefly on the iMessage thing, it’s, to me, much the same as Whatsapp, but maybe slightly worse. Unless Apple have devised some new cryptographic methods for messaging, they must have access to the encryption keys used for messages if you can recover the messages from iCloud to a new device without access to the old device. This is bad, and means they could potentially read the messages too.